

Create and edit items
An item is one entry in your channel. Publishing it can create a public web page and add an entry to both RSS and JSON feeds.
You can complete the whole workflow in the visual Admin dashboard. For repeatable or
agent-driven publishing, the official
@microfeed/cli manages the
same channel after its owner enables the authenticated API. Start with
Manage content with the microfeed CLI.
Create an item
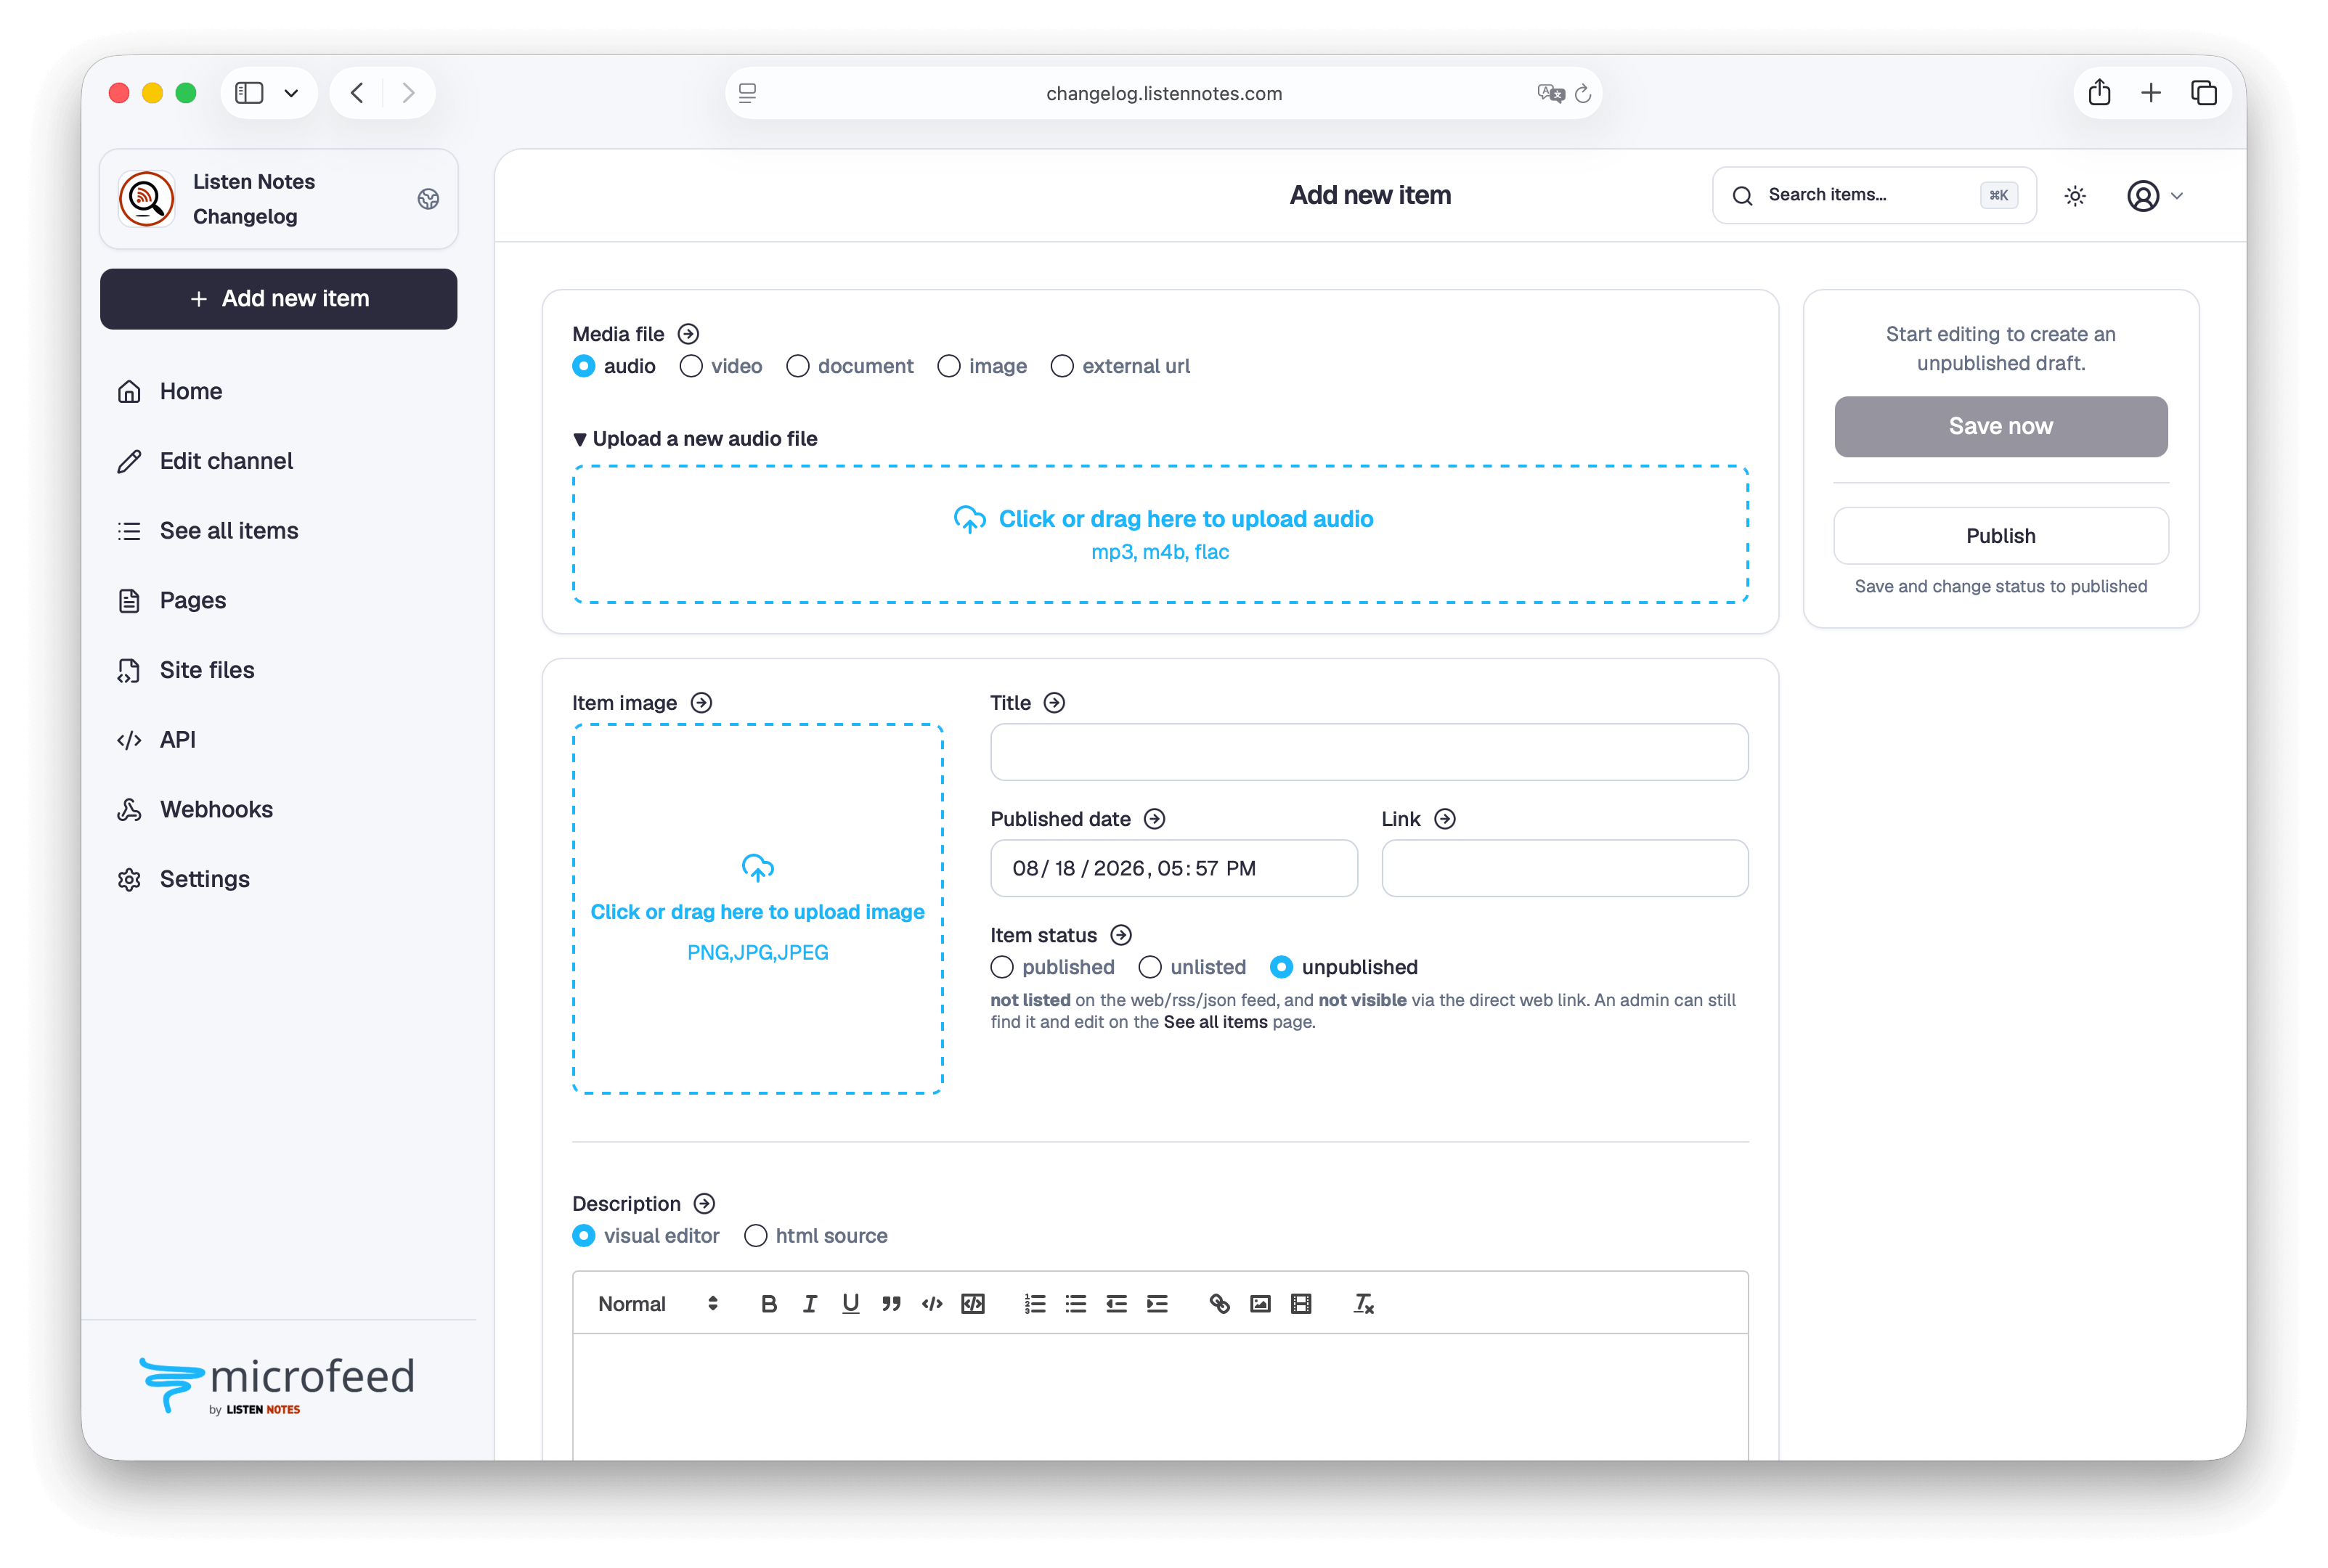
Section titled “Create an item”- Select Add item in the dashboard navigation.
- Choose the item type or media fields appropriate for the content.
- Add a clear title and description. The visual editor supports formatted text; the HTML source view is available when you need direct markup.
- Add an external URL or upload media when appropriate.
- Review the publication date, generated link, and item status.
- Leave the item Unpublished while you prepare it, or select Published when it is ready to go live.
Opening the form does not create an empty item. Your first genuine edit creates
one Unpublished draft, changes the browser address from /items/new/ to the
draft’s edit address, and adds it to See all items. Ordinary edits autosave
after a five-second pause. Published, Unlisted, and Unpublished status choices,
plus completed media uploads and replacements, save immediately. Other field
and selection changes use the five-second pause.
The action panel reports Unsaved changes, Saving…, or All changes saved. Select Save now to save without waiting. If a save fails, the form retains your changes and offers Retry save. Keep the page open until the latest changes are saved.
Selecting Published is an explicit action that saves immediately and makes the item public. If you have not changed the draft’s displayed publication date, the dashboard updates it to the publication time. A date you chose yourself is preserved. If public visibility is enabled, use the external link to inspect the page.
Upload media
Section titled “Upload media”Media uploads require an R2 bucket attached to the instance. If the uploader is
unavailable, check the R2 state with npx @microfeed/cli manage status. For a
content-only instance, run npx @microfeed/cli manage deploy --enable-r2 only
after R2 is available in the correct Cloudflare account.
Use meaningful titles and descriptions even when an image, audio file, or video carries most of the content. Text improves accessibility, search, and feed-reader context.
Edit or remove an item
Section titled “Edit or remove an item”- Select See all items.
- Find the item, then open its edit action.
- Change the fields and wait for All changes saved, or select Save now.
The editor preserves the item’s current Published, Unlisted, or Unpublished status when it opens. Changes to an existing item follow the same autosave and retry behavior as a new draft.
Deletion uses a confirmation dialog because it may remove both the item record and associated media. Read the target carefully before confirming.
Publish with a coding agent
Section titled “Publish with a coding agent”Give the agent a content goal and the root URL of your microfeed site. Do not give it an API key or CLI credential. For example:
Use `npx @microfeed/cli` to create a published item onhttps://feed.example.com. Use `--json` for deterministic output, and pause forme if API access must be enabled, browser authorization is required, or adestructive action needs confirmation.The recommended npx @microfeed/cli command works from any folder. Inside a
Git-cloned microfeed source repository whose dependencies are installed,
yarn microfeed is a shortcut to the local CLI version. You sign in and
approve permissions in the browser; the CLI stores and refreshes the credential
without printing it. Follow the guided CLI
workflow, then see the agent workflow
and complete @microfeed/cli reference for media vocabulary,
deterministic input, and deletion safeguards.
Verify distribution
Section titled “Verify distribution”After publishing, check:
- The item’s public page.
/rss/in a browser or feed reader./json/for the structured representation.
If the dashboard saves successfully but the public page is unavailable, review the channel’s access-control setting and item visibility first.